Customize your Video on Conferencing
For the last few weeks, whole world has been under various measures of lockdown. WFH (Working from home) and VC (Video Calls) have been the norm. One of the pet peeves I had with various VC tools used (Google Meet, Zoom etc) is that there is zero customization offered on choosing the output feed from your camera.
For most video calls, just face is enough - why bother with rest of the image? It also helps you in summer to be little more relaxed with informal clothing; plus cute moments like children running into video feed can be avoided.
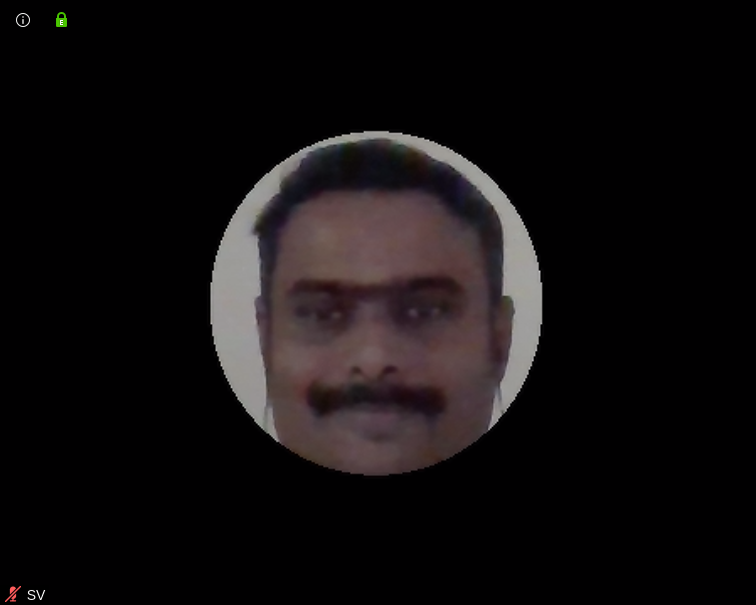
This is what I got my feed to be - read below on how to set it up.
Overall approach is to make a virtual camera and a filter that sits between real device and the virtual camera. Then, in your VC software, choose the virtual camera.
In Linux, we have all the tools readily available.
Tools
WebCamoid takes care of everything. I downloaded the AppImage, put it in my path and started it from command line.
Now, this doesn't create a virtual camera just like that. You need to enable virtual camera support. I downloaded akvcam. Compiling and installing it is very easy and instructions are on the site. It should work on OSX also, but I have not experimented with these.
Setup
-
Start WebCamoid. Click on the gear icon for Preferences and choose Output. Check the Virtual Camera checkbox and add a new Virtual Camera - give it an easy to remember name.
-
Now, click on the Play button on the left of the toolbar - it starts the video feed. Click on Effects and choose the desired effect. The one above is Vignette. Chosen effect has configurations on the right side - play with it.
-
Now, choose your VC. When you turn on the Video there, instead of regular camera, choose the virtual camera you created.
Done!
After that, whenever you change the effect in WebCamoid, it will be automatically applied.
Like below :)